To configure LeadLab4Salesforce initially for daily work, select the LeadLab Setup tab. Changes in the setup should only be made by the Salesforce administrator.
1. ) To activate your tracking account, select the button “Initialize Connection”.

2. ) You will receive a tracking code, including privacy policy and opt-out link.
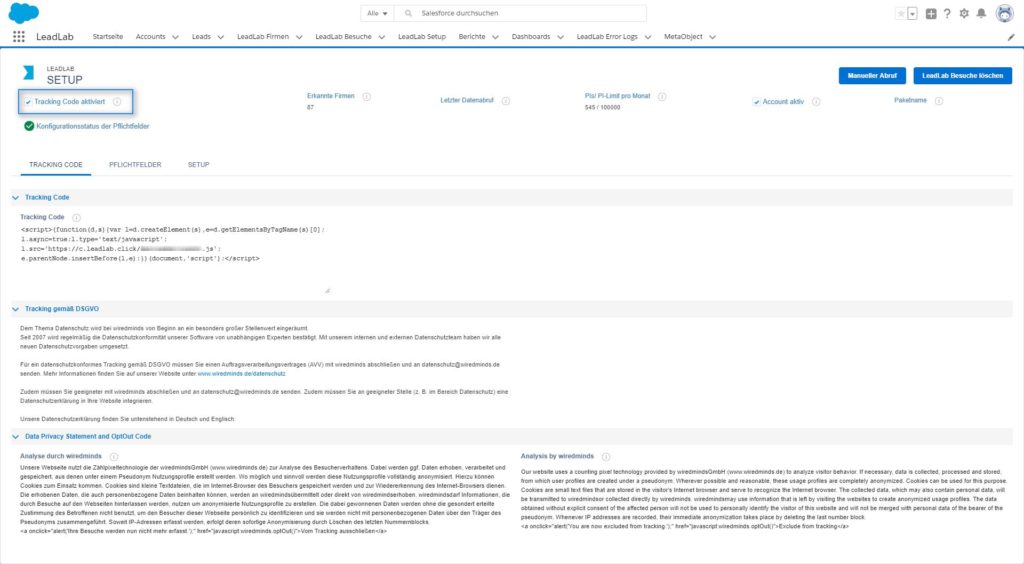
Your tracking code, the associated privacy passage and the opt-out link must be integrated into your website. To do this, contact your web agency or the webmaster responsible.
3. ) The button “Edit Setup” provides the following configuration options
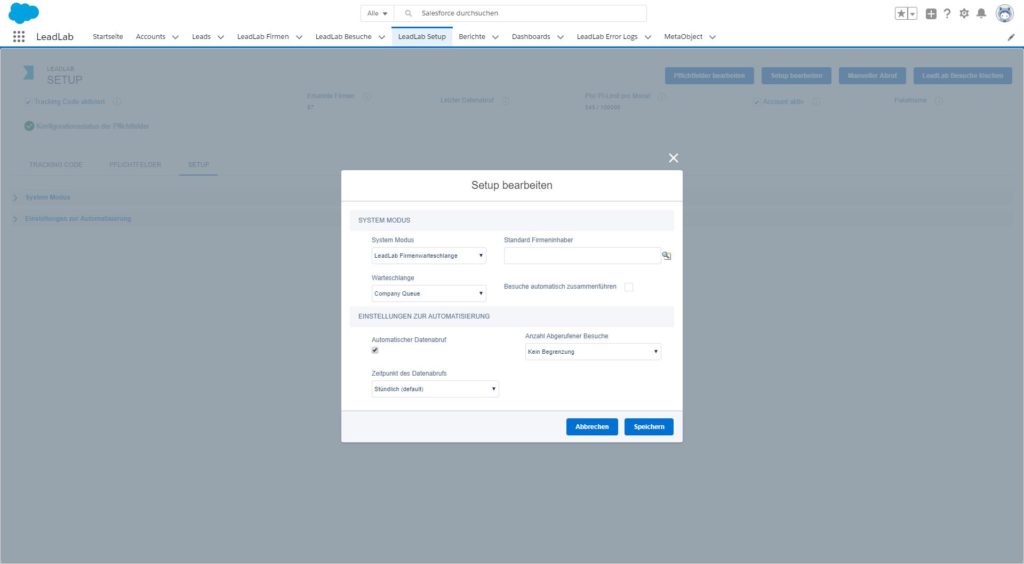
a. System Mode
The System Mode can be set to the following options:
– Automatic Lead Creation
– Automatic account creation
– Company queue (displayed in the Queue field)
b. Default company owner
Here you define to which person the data from LeadLab4Salesforce should be assigned. It is not mandatory to store a user, in this case a “Default” setting takes effect.
c. Automatically merge visits
This function can be activated or deactivated. As soon as it has been activated, a check is made during each data transfer to see whether similar-sounding leads or accounts exist for the LeadLab companies. In the positive case, the visits of a LeadLab company are directly attached to the lead or account, without the need for a manual link between the two data sets in advance.
d. Automatic data retrieval
This setting can be enabled or disabled. If you deactivate this setting, no more data will enter LeadLab4Salesforce. However, you can still transfer data into the system via a manual retrieval.
e. Time of data retrieval
The time of data retrieval can be customized to the following intervals:
– Hourly (default)
– 6 a.m.
– Every 12 hours
– Every 4 hours
f. Number of retrieved visits
The number of retrieved visits can be set to the following options:
– No limit
– Last 5
– Last 10
– Last 50 (default)
g. Mandatory fields under LeadLab Setup
If you use mandatory fields in your layout for leads or accounts, you must store them in LeadLab Setup under Mandatory fields.
4. ) Customize the page layouts in Account and Lead
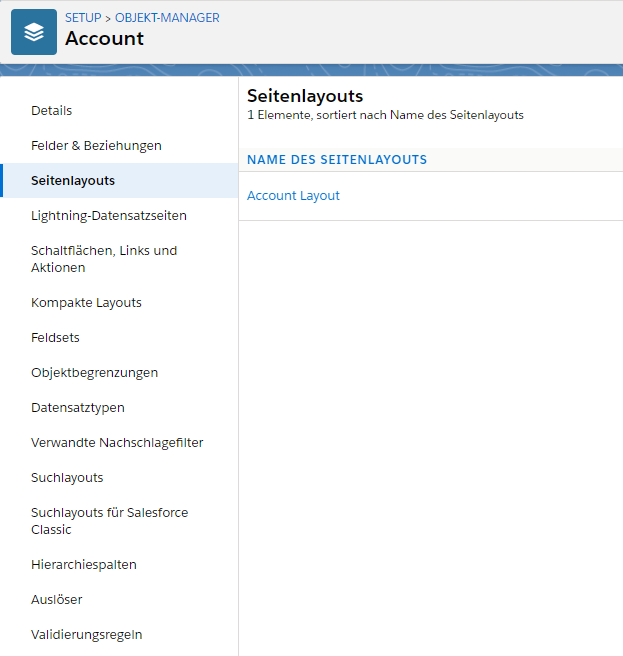
Select the Object Manager and the Account object. In the page navigation, select the page layout.
Select “Buttons” on the left in the page navigation and drag and drop “Unmerge” into the layout.
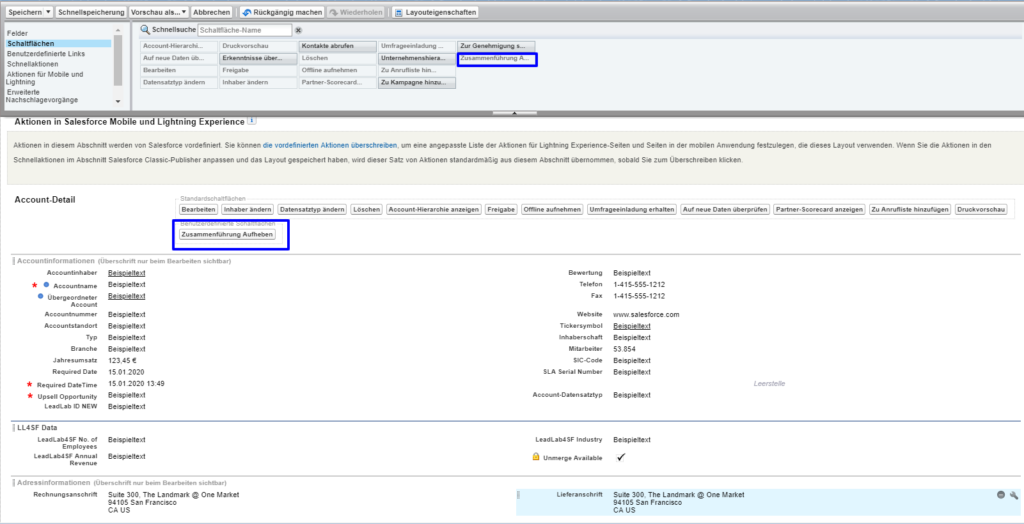
Select “Topic Lists Off” in the left side navigation and drag and drop “LeadLab Visits” into the layout.

Repeat the described steps for the Lead object. To do this, switch to the object manager and select the Lead object.
5. ) Customize the page layouts in the LeadLab company.
In the object manager, switch to the LeadLab Company object and select the page layout. In the layout page navigation, select “Visualforce pages” and drag and drop this into the layout.
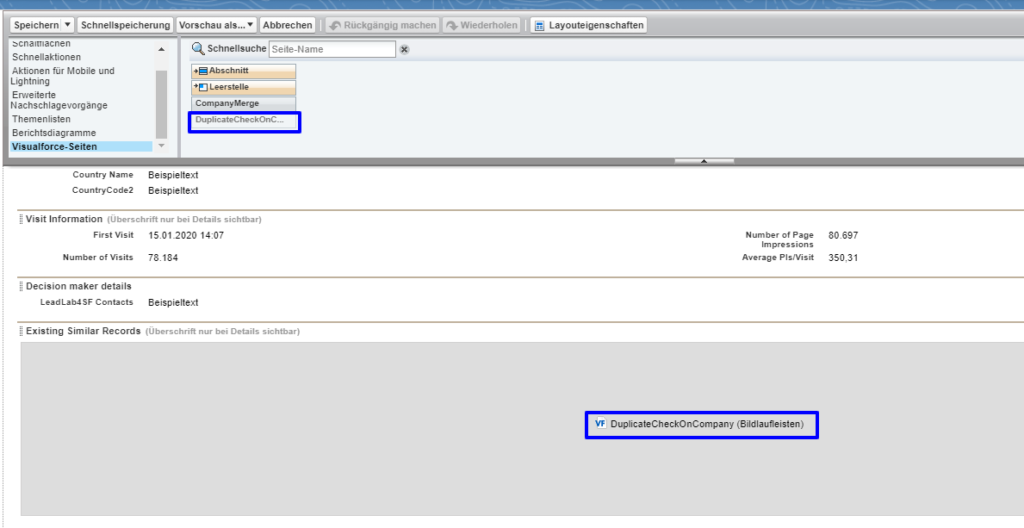
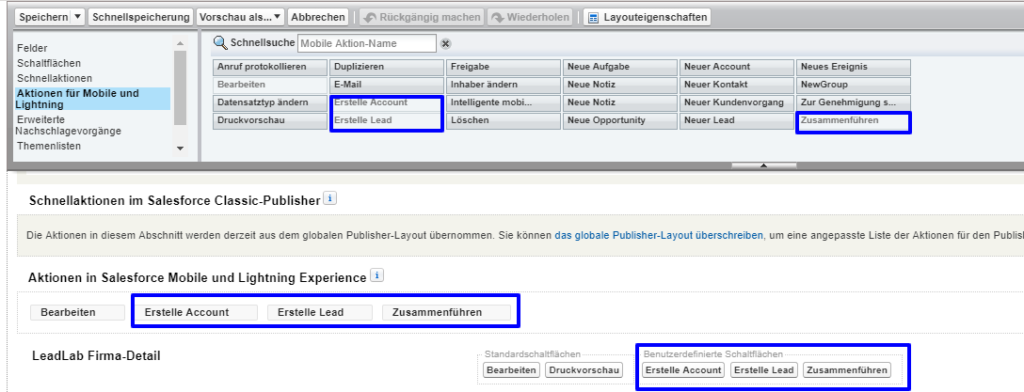
In the page navigation, switch to “Actions for Mobile and Lightning” and drag and drop the “Create Account”, “Create Lead” and “Merge” fields into the layout.
